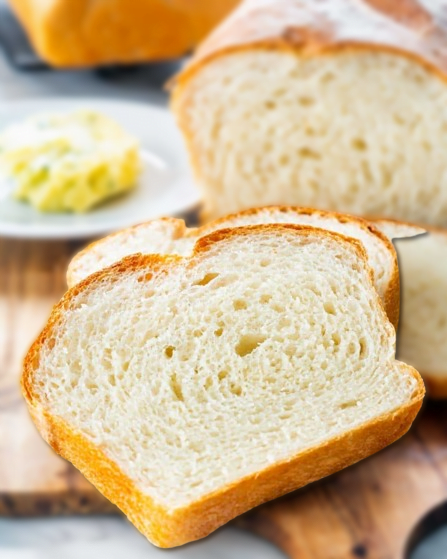
The outside of this potato bread is crispy and golden, while the interior is soft and fluffy. You’ll be shocked at how quick and easy this bread is to make, as well as how few ingredients there are! Ideal for inexperienced bakers.
Types and Varieties of Potato Bread
Classic Potato Bread
Classic potato bread is a traditional variety that combines mashed potatoes with basic bread ingredients, resulting in a soft and flavorful loaf.
Potato and Rosemary Bread
This variety infuses the aromatic flavor of rosemary with the moist texture of potato bread, creating a savory and fragrant loaf.
Sweet Potato Bread
Sweet potato bread offers a sweet twist to the traditional recipe, using sweet potatoes to add natural sweetness and a vibrant color.
Gluten-Free Potato Bread
Gluten-free potato bread caters to those with gluten sensitivities, utilizing alternative flours to create a similar texture and taste.
If you’ve never heard of this beautiful loaf before, pay attention! We’re using potatoes in place of some of the flour required to make bread the old-fashioned way! Using potatoes instead of the usual overly processed store-bought loaves allows us to add a significant amount of wonderful nutrients to the bread.
If you want to attempt making homemade bread, my potato bread recipe is a great place to start because it’s a flexible and healthy option!
Why Make This Potato Bread
- Perfect For Toast or Sandwiches
- Easy To Make
- Simple, Short Ingredient List
- Versatile
Making this bread is so simple! It’s a terrific bread to try making and may be used for a variety of applications! Do not be scared if you have never cooked bread. It will get easier the more you create!
The longest shelf life of this potato bread is my favorite feature. The starches in the potatoes react to absorb moisture since we are using them in place of part of the flour in this recipe. This implies that we won’t have to worry about our bread turning stale for a longer period of time!
Ingredients You’ll Need

Potatoes – I used peeled and diced russet potatoes for my potatoes.
Milk– Choose your preferred milk. either non-dairy or dairy. Since that’s about the only milk we have in the home, I always use non-dairy.
Butter– Since we already add salt to our bread, I always use unsalted butter and can thus regulate the amount of salt that goes into my baked goods. It may surprise you to learn that breads with minimal amounts of butter are baked with a crispier exterior and a greater rise!
Yeast: For this recipe, I used quick yeast. Dry yeast can be used, but it must first be activated in a little amount of water with a small amount of sugar.
Flor – All-purpose flour works best for this type of bread, so that’s what I used. You might also mix some all-purpose flour with some whole wheat flour.
Salt – Salt is an essential element for baking; without it, your bread won’t taste nice.
How To Make Potato Bread

Prep:
Cook the potatoes: Place the potato cubes in a medium-sized saucepan with two to three cups of water. Over medium-high heat, bring to a boil and simmer until fork tender, 10 to 15 minutes. Once drained, use a fork to mash it.
Warm the milk before adding the potato: Pour the milk into a medium-sized saucepan, then stir in the salt and butter. Heat over medium heat until the milk begins to bubble slightly around the edges. Add the mashed potatoes after stirring it. Transfer the mixture into the stand mixer bowl and allow it to cool until it is slightly warm but not too hot to handle.
To make the dough, combine the yeast with two cups of flour in the bowl of a mixer. Mix the flour into the milk mixture completely with the paddle attachment. Add two more cups of flour and change to the dough hook. Mix for five to seven minutes on low speed. Remaining flour should be added as needed; it should be loose and somewhat sticky but should generally come clear from the bowl’s edges.
First rise: After using cooking spray to grease a large basin, transfer the dough into the bowl. Place a moist clean towel or plastic wrap over it, and let it to rise in a warm, draft-free area until it has doubled in size. The dough can also be chilled for an entire night; it will gradually rise in the fridge.

Finish:
Put dough into loaf pans; press down with your hand to release any trapped air. Transfer the dough to a sanitized, lightly dusted surface. Knead a few times with your hands, then divide into two equal-sized pieces using a pastry scraper and shape into loaves. Coat two 8-by-4-inch loaf pans with cooking spray or a little amount of oil. Put each portion in the pans that have been oiled.
Second rise: Make three slits in each loaf, if desired, then lightly dust the tops of the loaves with flour. Allow the loaves to rest for a further thirty to one hour, or until they have doubled in size, in a warm, draft-free location.
Bake: Preheat the oven to 375°F while the loaves are resting. After placing the loaf pans in the oven, bake them for 35 to 40 minutes, or until a light tap indicates that the bread is hollow. To avoid overbrowning, lightly cover the loaves with foil if they have browned on top but haven’t cooked all the way through. Bake them until they are done. When the interior temperature of the loaves reaches between 190°F and 200°F, they are fully cooked.
Cool & Slice: Let the loaves cool for about 2 minutes in the pans, then gently run a dull knife along the edge of the pan to loosen the bread. Turn the loaf pans onto a cooling rack and let cool completely before slicing and serving.

Tips for Perfect Potato Bread
Common Mistakes to Avoid
- Using too much flour, which can make the bread dense
- Not allowing the dough to rise fully, resulting in a heavy loaf
- Baking at too high a temperature, causing the crust to burn before the inside is cooked
Tips for Achieving the Perfect Texture
- Ensure the potatoes are thoroughly mashed and free of lumps
- Knead the dough well to develop the gluten structure
- Allow the dough to rise in a warm, draft-free place

Health Benefits of Potato Bread
Nutritional Profile of Potato Bread
Potato bread offers a unique nutritional profile, combining the benefits of potatoes and bread. It is typically lower in calories and higher in potassium compared to regular bread.
Benefits of Potatoes in the Diet
Potatoes are rich in vitamins, minerals, and antioxidants. They are a good source of vitamin C, potassium, and fiber, contributing to overall health and well-being.
Comparison with Other Types of Bread
Compared to white bread, potato bread has a higher moisture content, which helps to keep it fresh longer. It also generally has a slightly higher protein content due to the addition of potatoes.
Storing
This is a bread with staying power! Thanks to the starch in the potatoes, it will absorb more water, therefore giving us a softer texture for longer! Your potato loaf should keep for over a week, covered at room temperature.
Freezing
This potato bread is great for freezing. It’s important to freeze bread while it’s still fresh and not after it has gone stale. Let the bread cool completely before storing it in freezer bags. Bread will last in the freezer for 3 to 6 months.


Potato Bread
Ingredients
- 2 medium russet potatoes peeled and cubed
- 1½ cup milk
- ¼ cup butter unsalted
- 1 teaspoon salt
- 2¼ teaspoon instant yeast 1 packet
- 4½ cups all-purpose flour up to 5 cups
Instructions
- Cook potatoes: Fill a medium-size saucepan with 2 to 3 cups of water and add the potato cubes. Bring to a boil over medium-high heat and cook for 10 to 15 minutes or until fork tender. Drain and mash it with a fork.
- Heat the milk and add the potato. Add the milk to a medium-sized saucepan and add the butter and salt. Heat on medium heat until the milk bubbles start around the edges a bit. Stir it, then add the mashed potatoes. Pour this mixture into the bowl of your stand mixer and let it cool until it is still warm but not hot to the touch.
- Make the dough: Add the yeast to the mixer bowl and 2 cups of flour. Using the paddle attachment, mix until the flour is fully incorporated into the milk mixture. Switch to the dough hook and add another 2 cups of flour. Mix on low speed for 5 to 7 minutes. Add the remaining flour as needed; it should mostly come clean from the sides of the bowl but should still be loose and a little gluey.
- First rise: grease a large bowl with cooking spray, then place the dough in the bowl. Cover with plastic wrap or a damp, clean towel, and let it rise in a warm, draft-free spot until doubled in size. You can also refrigerate the dough overnight; it should slowly rise in the fridge.
- Place the dough in loaf pans. Punch down the dough with your fist to let the air out. Turn the dough onto a clean and lightly floured surface. Knead it with your hands a couple times, then, using a pastry scraper, cut it into two equal-sized pieces. Great 2 8×4-inch loaf pans with a little oil or cooking spray. Place each half into the greased pans.
- Second rise: lightly sprinkle the top of the loaves with a bit of flour, and if preferred, cut 3 slits into each loaf. Let the loaves rest in a warm, draft-free environment for another 30 minutes to an hour or until doubled in size.
- Bake: While the loaves are resting, preheat the oven to 375°F. Transfer the loaf pans to the oven and bake for 35 to 40 minutes, or until the bread sounds hollow when lightly tapped. If the loaves are browned on top but still not baked through, cover them loosely with foil to prevent over-browning and continue baking until done. The breads are baked when the internal temperature is between 190°F and 200°F. Let the loaves cool for about 2 minutes in the pans, then gently run a dull knife along the edge of the pan to loosen the bread. Turn the loaf pans onto a cooling rack and let them cool completely before slicing and serving.
Notes
- The recipe yields 2 loaves, and the nutritional information assumes 10 slices per loaf, and it’s per slice.
- I used 2 medium russet potatoes, which should yield 1 to 1.5 cups worth of mashed potatoes.
- Let the loaves cool completely before slicing to make it easier!
- If the loaves are browned on top but still not baked through, cover them loosely with foil to prevent over-browning and continue baking until done.
- Thanks to the starch in the potatoes, it will absorb more water, therefore giving us a softer texture for longer! Your potato loaf should keep for over a week, covered at room temperature.
- This potato bread is great for freezing. It’s important to freeze bread while it’s still fresh and not after it has gone stale. Let the bread cool completely before storing it in freezer bags. Bread will last in the freezer for 3 to 6 months.

